A while back, I signed up for the beta of Bitbucket Pipelines, a new continuous integration service from Atlassian, built into Bitbucket. The build system promises easy configuration using YAML files to describe the build steps. It runs builds in a Docker image, so that means we can also use it for building and packaging .NET Core libraries. Let’s see how.
TL;DR: Want to use Bitbucket pipelines to build .NET Core libraries? Grab this bitbucket-pipelines.yml and add it to source control.
Sample .NET Core library
I created a simple .NET Core library which contains a useless Hello.cs class, and a project.json that holds project metadata. The class itself is not very interesting, the project.json file is:
{
  "name": "Sample-DotNet",
  "version": "1.0.0-*",
  "authors": [ "MyGet" ],
  "owners": [ "MyGet" ],
  "projectUrl": "http://www.myget.org",
  "requireLicenseAcceptance": false,
  "summary": "A sample dotnet library.",
  "dependencies": {
    "NETStandard.Library": "1.6.0"
  },
  "frameworks": {
    "netstandard1.6": {
      "imports": "dnxcore50"
    }
  }
}
To redistribute a .NET Core library, there are a couple of items we need in here. First of all, we want to name our library. We can omit this in project.json, but that creates an ugly-looking NuGet package name later on so let’s be good citizens and add a name. Next, we need a version. Versions should follow Semantic Versioning so we can make it clear to our users what they will get when they upgrade our package to a newer version. Let’s start at 1.0.0-* (more on the * later) and have our Bitbucket pipeline handle prerelease version increments on each build.
Creating a bitbucket-pipelines.yml
The bitbucket-pipelines.yml file is where build configuration happens. Generally, it will contain:
- The Docker image to use for running the build
- The build steps involved
- Optionally, each branch can have other build steps configured as well
So let’s start at the beginning: the Docker image. To be able to build, test and package our library, we need a Docker image that has the .NET Core runtime installed. Luckily for us, Microsoft provides a .NET Core Docker image in the Docker hub. We’ll be using the onbuild image, as it holds both the runtime and the tools required to build and package sources. In the below bitbucket-pipelines.yml file, this image is referenced on the first line.
Next, we’ll add our build steps. Under the pipelines | default | step | script node, we can write out our build steps. Here’s what we want to do:
-
Generate a version number (so each time we build, the package version number increases). We can do this using a simple git command, fetching the number of commits on the current branch (
git log --oneline | wc -l). To be able to use the value later on when creating our package, we can assign it to an environment variable. -
Restore dependencies. Our sample library does not have any dependencies listed, but pretty much any proper library will have dependencies listed in
project.jsonso let’s run adotnet restore. -
Build sources. We want to make sure our code compiles, which can be done using a
dotnet build. -
The next step is where packaging happens. We want to create a NuGet package for our library, based on the metadata from our
project.jsonand the build number we created as the first step in this pipeline. Remember the version1.0.0-*? We’ll replace the*with a suffix that holds our build number, so that the generated NuGet package has a nice, incrementing version number each time we have a change to our source code. -
Pipelines do not have an artifact store, so we’ll have to push our generated package to a NuGet feed somewhere. MyGet provides NuGet hosting, so let’s push to a feed there. Unfortunately, the .NET Core command line does not have a
pushcommand (yet) for publishing the generated NuGet package to an external feed like MyGet.On the bright side, the NuGet API for pushing packages is not that complicated and we can do a simple HTTP POST using curl: `curl -X POST “https://www.myget.org/F/myfeed/api/v2/package” -H “X-NuGet-ApiKey:” -T
`
In the below bitbucket-pipelines.yml file, I introduced some environment variables for specifying the build configuration, NuGet feed URL and API key. I also added a one-liner that pushes every generated NuGet package instead of just one, so that it’s easier to copy/paste the below and get up and running fast.
image: microsoft/dotnet:onbuild
pipelines:
  default:
    - step:
        script:
          # Generate build number

          - BUILD_NUMBER=`git log --oneline | wc -l`
          - echo "Build number':' ${BUILD_NUMBER}"
          # Restore packages

          - dotnet restore
          # Build project

          - dotnet build
          # Run tests

          # - dotnet test

          # Create package

          - dotnet pack --configuration ${BUILD_CONFIGURATION} --version-suffix=beta-$BUILD_NUMBER project.json
          # Push generated package(s)

          - "for file in bin/${BUILD_CONFIGURATION}/*.nupkg; do curl -X POST \"${MYGET_NUGET_URL}/package\" -H \"X-NuGet-ApiKey: ${MYGET_NUGET_APIKEY}\" -T $file; done"
Are we there yet? Almost! Feel free to copy the bitbucket-pipelines.yml file into your project, and then…
Configure pipeline environment variables
When using my sample bitbucket-pipelines.yml, you may find there are a couple of environment variables to be set:
MYGET_NUGET_URL: The full URL of the NuGet feed on MyGetMYGET_NUGET_APIKEY: MyGet API keyBUILD_CONFIGURATION: Build configuration (Debug/Release)
Open your Bitbucket repository and select Settings | Pipelines | Environment Variables. Add the above keys, and the values that apply to your environment:
 {: .align-center}
Note that for the API key, I used a secured variable so the UI shows a mask instead of the actual value.
Inspecting pipelines output
Once we have a bitbucket-pipelines.yml and configure environment variables, we can enable Bitbucket pipelines for our repository (Settings | Pipelines | Settings) and look at the live output right after a commit:
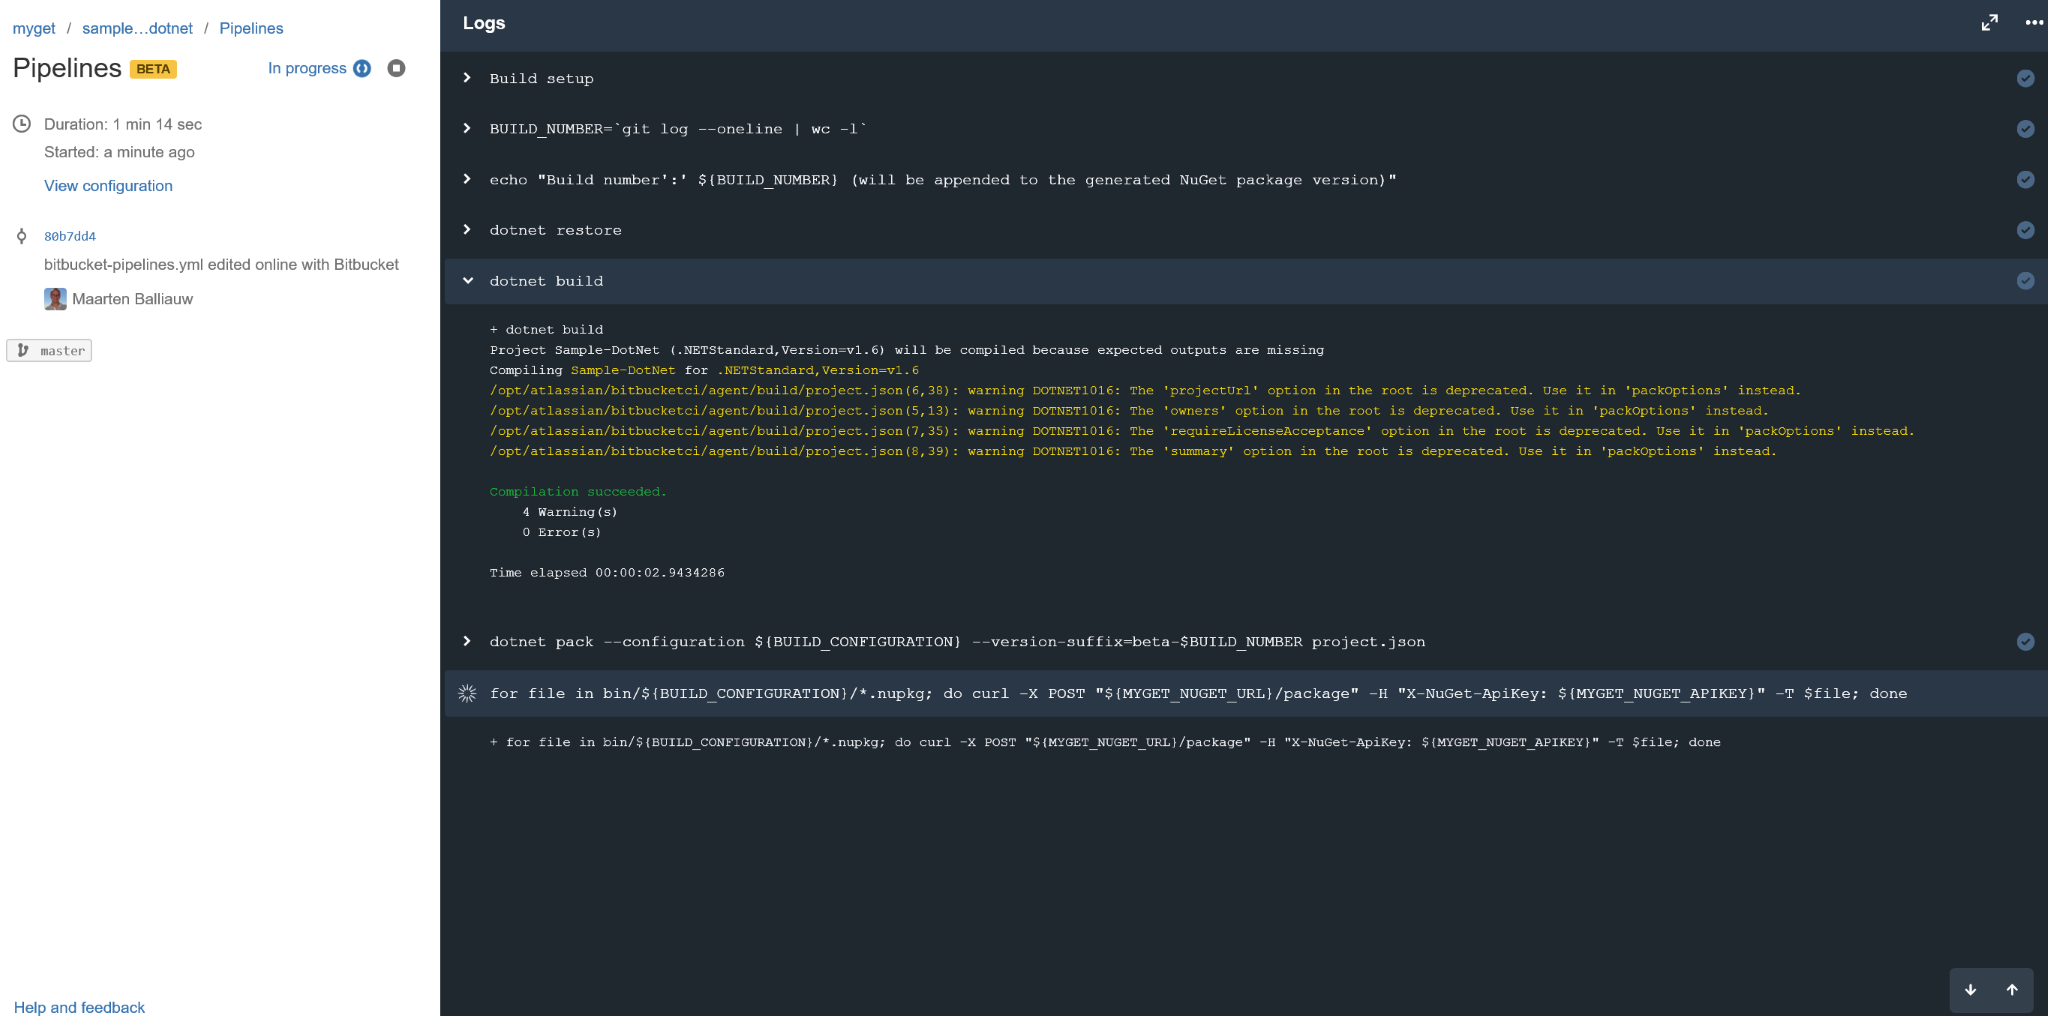 {: .align-center}
Once the pipeline completes, our MyGet feed will contain a new NuGet package version:
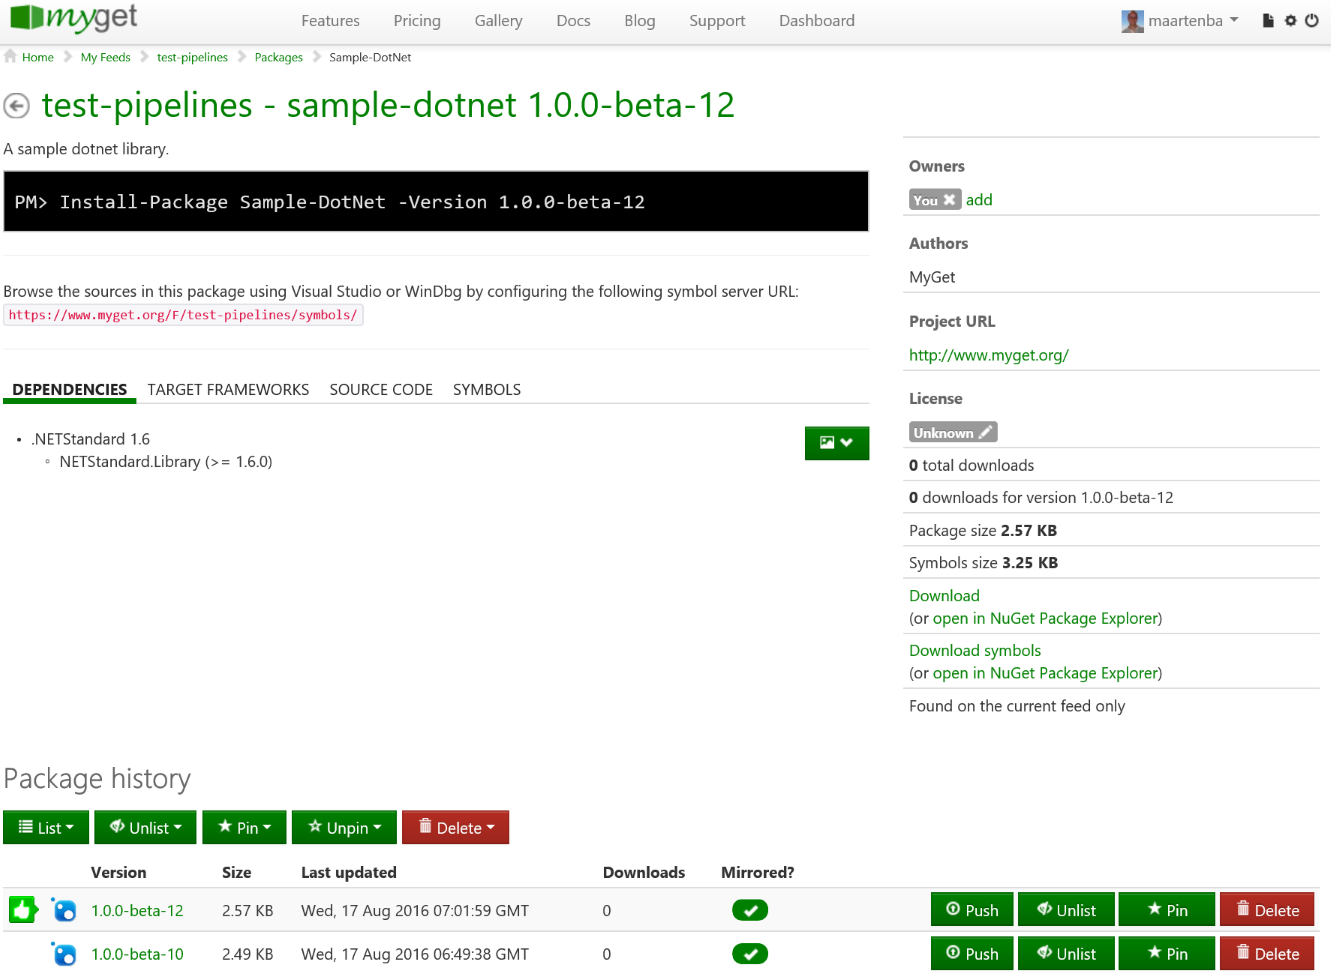 {: .align-center}
Pipelines sure look promising! Enjoy!