The latest relase of the WIndows Azure platform, portal and tools (check here) includes support for one of the features announced at PDC last month: remote desktop access to your role instances. This feature is pretty easy to use and currently allows you to deploy a preconfigured VM with IIS where you can play with the OS. No real application needed!
Here’s how:
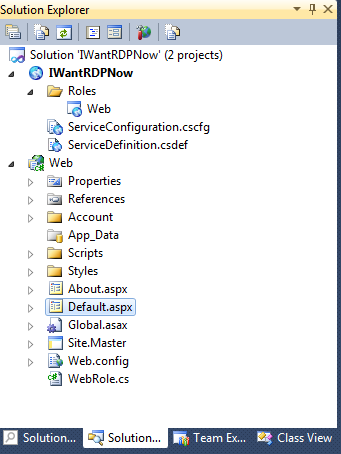
- Create a new Cloud Service and add one Web Role. This should be the result:
- Once that is done, right click the Cloud Service and select “Publish…”
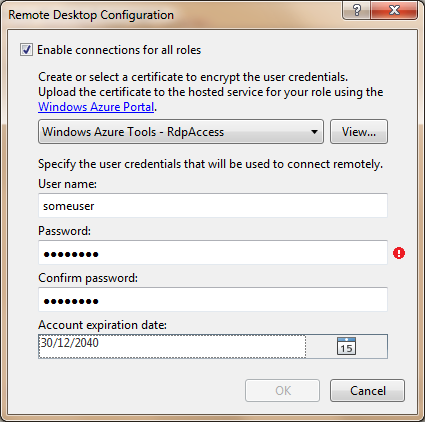
- In the publish dialog, click “Confiure Remote Desktop connections…”
- Create (or select) a certificate, make sure you also export the private key for it.
- Enter some credentials and set te expiration date for the account to some far future.
- Here’s an example of how that can look like:
- Don’t publish yet!
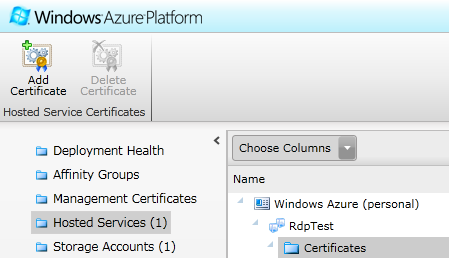
- Navigate to http://windows.azure.com and create a new Hosted Service. In this hosted service, upload the certificate you just created:
- Once that is done, switch back to Visual Studio, hit the Publish button and sit back while your deployment is being executed.
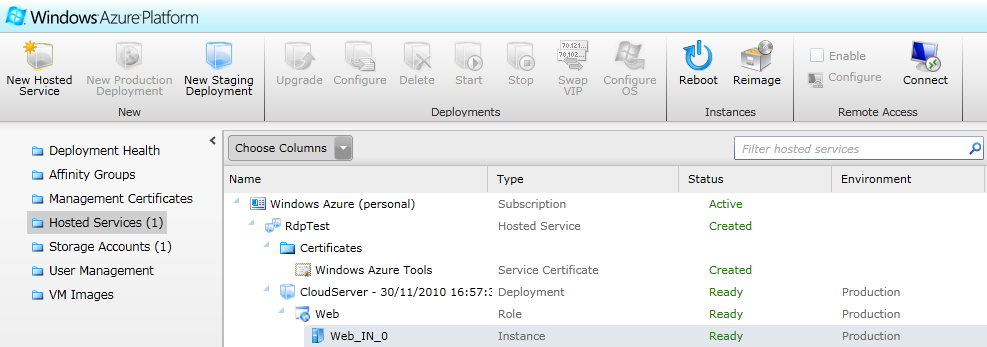
- At a given moment, you will see that deployment is ready.
- Switch back to your browser, click your instance and select “Connect” in the toolbar:
- Enter your credentials, prefixed with . E.g. “\maarten”. This is done to strip off the Windows domain from the credentials entered.
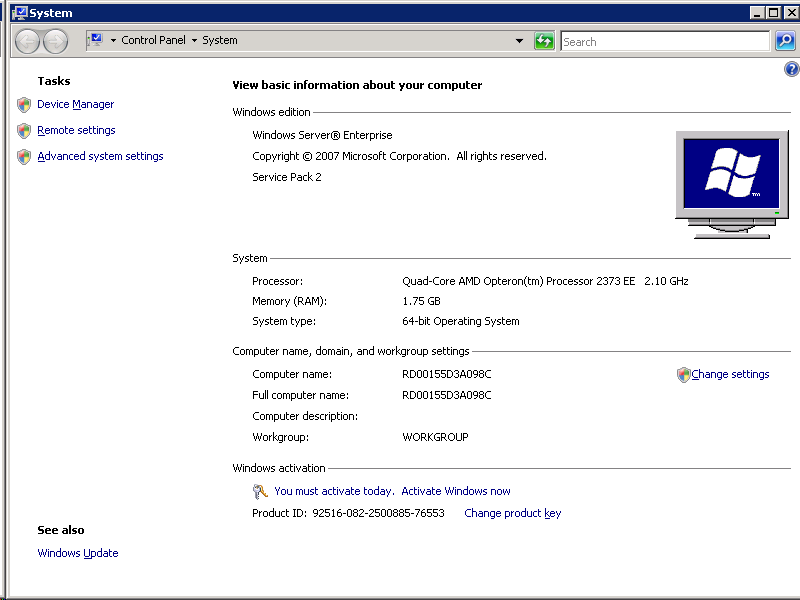
- RDP happyness!