Test-Driving Windows 11 Dev Drive for .NET
Edit on GitHubAt Build 2023 back in June, Microsoft announced a new form of storage volume for Windows 11: Dev Drive. In October 2023, support for Dev Drive was shipped as a Windows Update and now available to anyone using the latest version of Windows 11.
Dev Drive promises better performance for typical developer workloads, where faster file I/O performance matters. It is built on the newer Resilient File System (ReFS) as opposed to the default NT File System (NTFS) on Windows, and combined with the new performance mode of Microsoft Defender Antivirus, promises an up to 30% performance increase for overall build times.
In this blog post, I’ll share my story of migrating (some) of my workflow to using Dev Drive and ReFS, how to configure package managers such as NuGet, Maven, Gradle and npm to store their caches on a Dev Drive. I’ll also try to run my IDE from the Dev Drive, to see if it makes things any faster.
What are Dev Drives and ReFS in Windows 11?
In Windows, disk partitions are usually formatted with the default New Technology File System (NTFS), although you may also see variations of the File Allocation Table (FAT) file system in use, such as FAT32 and exFAT.
Dev Drive in Windows 11 is based on a newer file system, the Resilient File System (ReFS), introduced in Windows Server 2012. A Dev Drive is a partition formatted with ReFS, combined with the new Microsoft Defender Antivirus performance mode.
After analyzing typical developer workloads, Microsoft sees this combination of technologies as a perfect fit for workloads and projects where efficient file access is critical:
- Having fast access to your project source code while writing, building, testing and debugging.
- Speeding up package manager caches and package installation when working with NuGet, npm, Maven, Gradle, pip, Composer and others.
- Other disk-bound operations, such as cloning sources, copying files, running builds, and so on.
Next to using the newer ReFS file system, Microsoft Defender Antivirus activates performance mode for Dev Drive. On NTFS volumes, Defender always performs a real-time protection scan when accessing a file. Dev Drives are marked trusted (by default), where Defender will perform a deferred scan of files. This performance mode is faster since there’s no real-time security scan overhead, while still performing the scan asynchronously.
A physical disk or a virtual disk?
There are (generally) two types of Dev Drive you can create in Windows 11: formatting a physical disk partition as a Dev Drive, or creating a virtual hard disk and formatting it.
My developer laptop has a C:\ drive, which contains the operating system, package manager caches, and all kinds of data I consider ephemeral. I also have a D:\ drive, which contains project source code, a copy of my OneDrive folder, and so on. That’s data I can always retrieve from relevant Git repositories and the cloud, but having these on a separate partition usually does speed up reinstalling Windows as I don’t have to download half the Internet again.
There’s a saying, go big or go home, so I decided to go big and format an actual disk partition as a Dev Drive – my D:\!
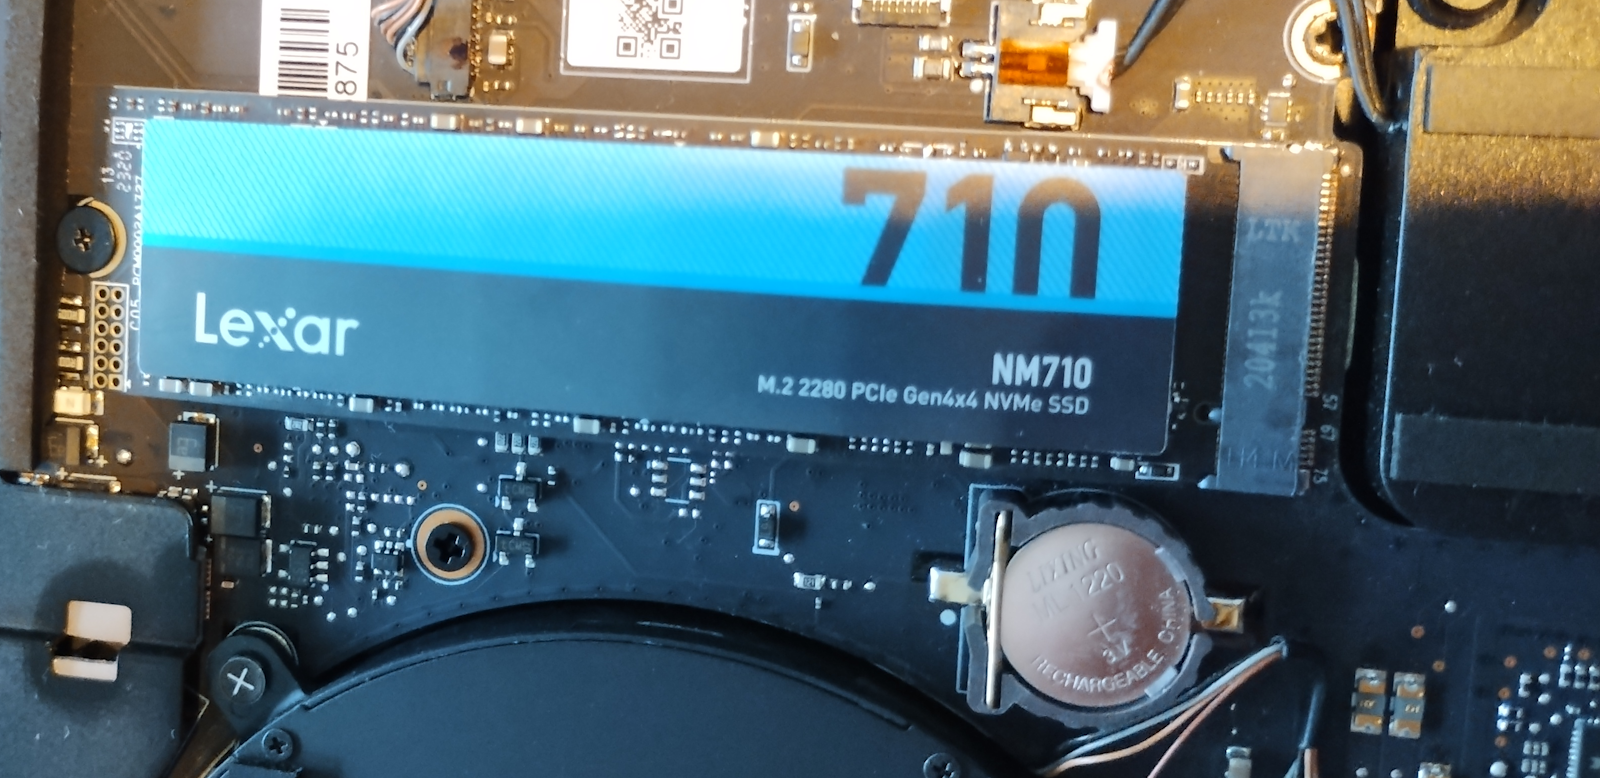
Unfortunately, I did not have enough space left to move gigabytes of package manager caches over to that disk, so I ordered a new SSD to make it happen. Installing the drive was easy enough, the hardest part finding a Torx T4 screwdriver around the house to open up my laptop. By the way, doing hardware work is also a great time to clean your laptop fans!

With that out of the way, I sealed my laptop again, powered it on, and Windows found an uninitialized disk in my machine. Great!
Setting up a Dev Drive
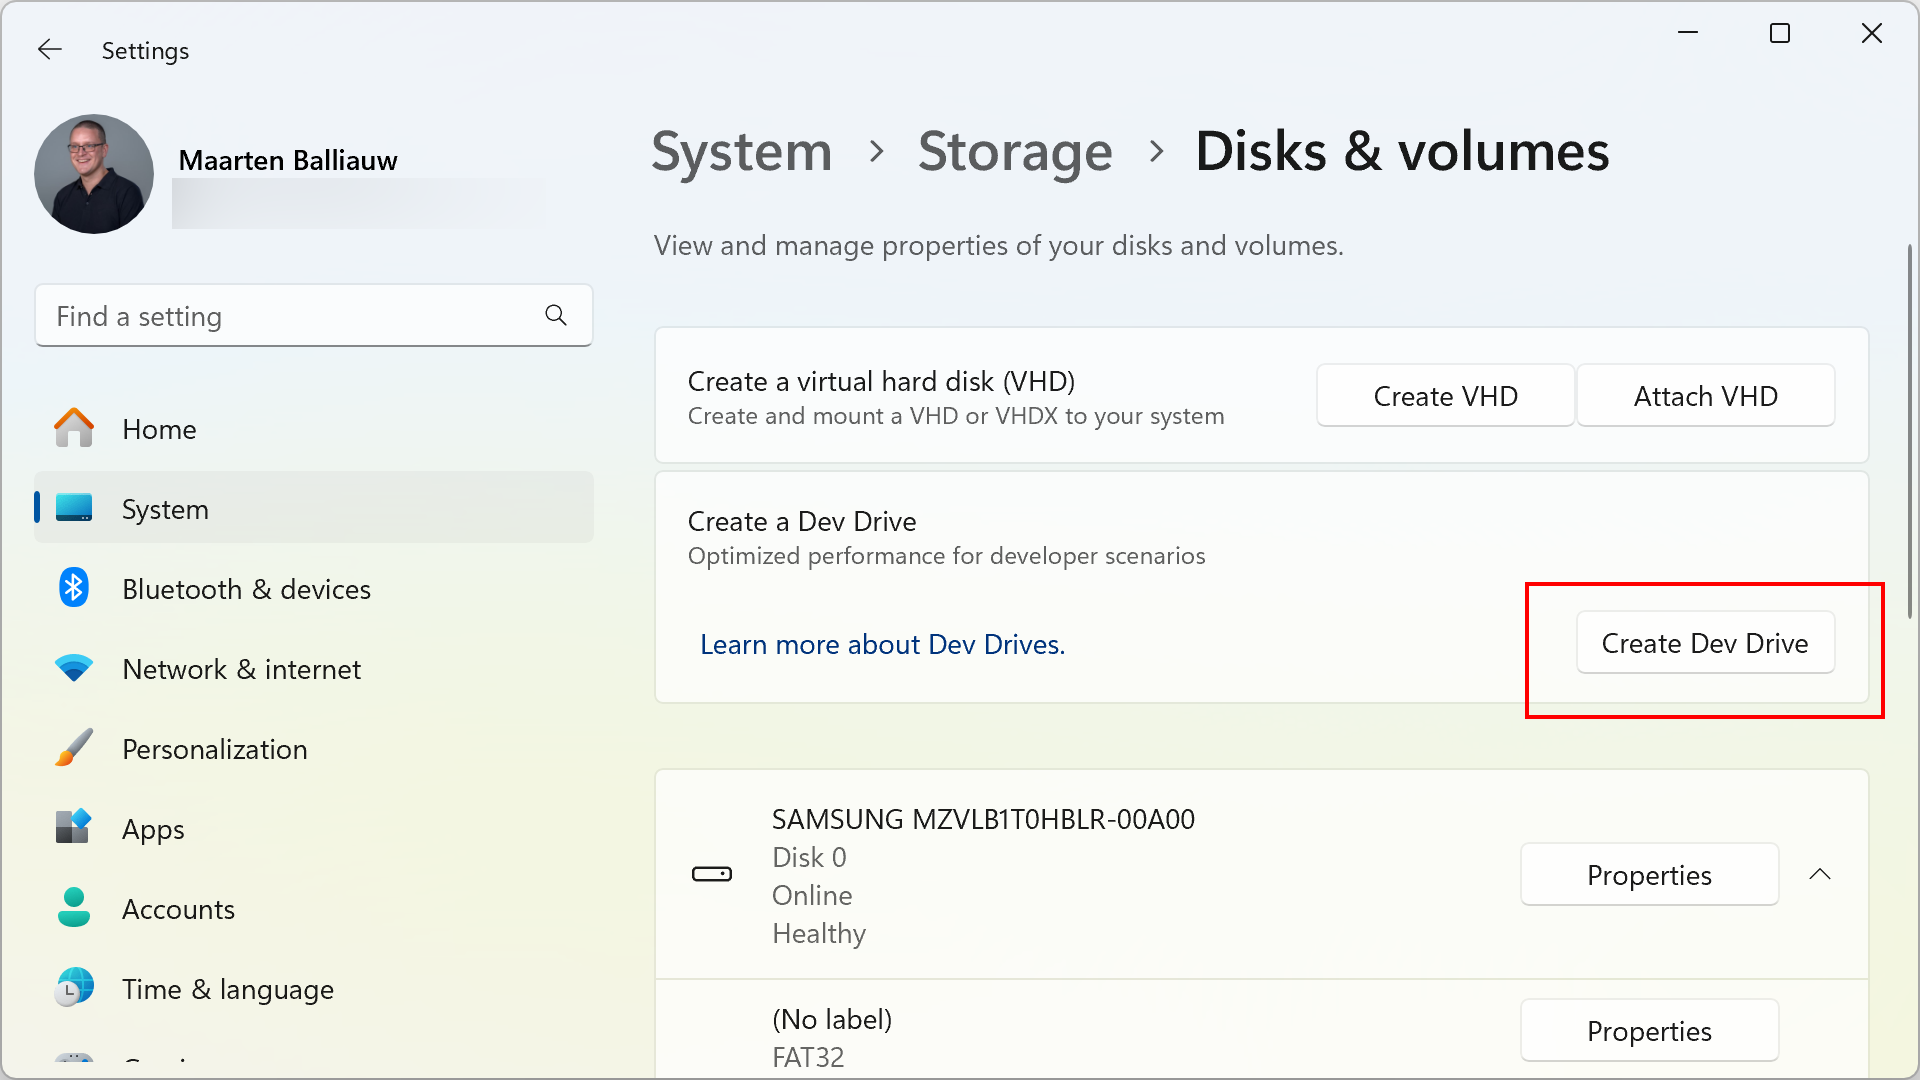
Whether you choose a physical or virtual disk for your Dev Drive, you’ll need to dive into the Windows Settings. Navigate to System | Storage | Advanced Storage Settings | Disks & volumes, and click Create Dev Drive.

You’ll be greeted by a wizard that lets you create a new Virtual Hard Disk (VHD), resize an existing volume, or use an uninitialized disk. Whichever option you choose, make sure you have at least 50 GB of storage available. If you want more step-by-step instructions, take a look here.
In my case, I went with the newly installed SSD, and then copied over all of my files from my old D:\ drive. An hour or two later (copying files takes some time), I was able to remove the old D:\ drive and give its free space to C:\. Back to two drive letters, yay!
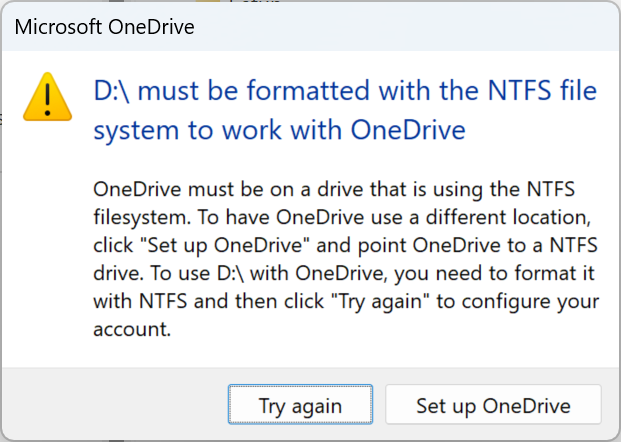
As a good Windows user, I instinctively rebooted my machine after this to make sure that was still possible. I had read beforehand that ReFS drives are not bootable, and while my C:\ was supposed to be NTFS still, I wanted to make sure. My machine booted without issue, except I was presented the following message from OneDrive:

This was a bit of a deal breaker for my “go big or go home” approach, as I wanted to keep OneDrive on my D:\ drive. I decided to move it back to NTFS, and go with the virtual disk approach instead. Another two hours of copying data later, and after finishing the Dev Drive setup with a virtual disk, I now have 3 volumes: 2 are using NTFS, and one is using ReFS.

If you, too, decide to go big or go home, make sure to read about limitations of Dev Drive, expect some software to not be compatible yet (such as OneDrive in my case), and make sure to have backups around. I want to plug the excellent Macrium Reflect here, which I use to create weekly images of my entire laptop and has saved my… skin a couple of times over the years.
Now, on to putting that Dev Drive to use!
Moving source code to Dev Drive
An obvious first type of data to move to Dev Drive was my Git folder. All of the source code I regularly work with is in that folder, and with source code being one of the workloads where Dev Drive would be providing better performance, I decided to start with moving that folder over.

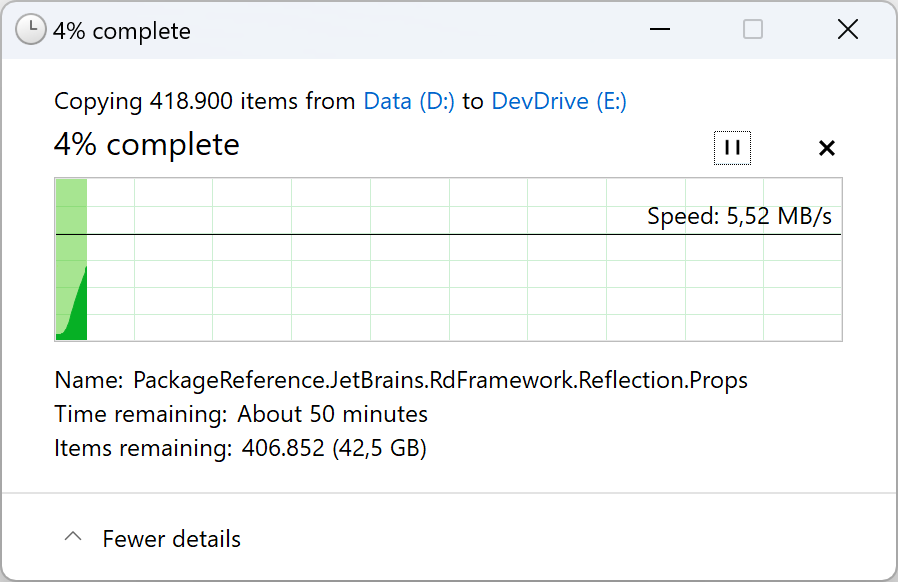
The copy dialog mentioned “about 50 minutes” for this process to complete. We all know that estimate is often incorrect, and experience from many years of using Windows in copying lots of small files made me wary this would take at least more than an hour in reality.
A pleasant surprise was that only a few minutes in, 100,000 of the 418,900 items were copied over already, and the entire copy operation finished in roughly 15 minutes. While not a scientific experiment, this did bode well for Dev Drive performance!
Moving package manager directory locations to Dev Drive
After moving source code to Dev Drive, I wanted to move package manager directories over. Microsoft’s documentation explains how to do this for npm (nodejs), NuGet (.NET), vcpkg (C/C++), pip (Python), Cargo (Rust) and Maven (JVM). There are generally 2 steps involved for each of those:
- Setting an environment variable or configuration value to point the package manager to use a different location (the Dev Drive);
- Copy over existing caches so you don’t have to download all of them again.
Most of my coding is using .NET and Java/Kotlin, combined with JavaScript, so I wanted to move over package manager caches for those. Based on those, here’s a PowerShell script that moves the data for those package managers to a Dev Drive, and sets the environment variables to configure the new path:
# Create packages directory on Dev Drive
$DevDrive = "E:"
New-Item -Path $DevDrive\ -Name "Packages" -ItemType "directory"

# Move npm packages
Move-Item -Path $env:LocalAppData\npm-cache* -Destination $DevDrive\Packages

# Move NuGet packages
Move-Item -Path $env:UserProfile\.nuget* -Destination $DevDrive\Packages

# Move Maven packages
Move-Item -Path $env:UserProfile\.m2* -Destination $DevDrive\Packages

# Move Gradle cache
Move-Item -Path $env:UserProfile\.gradle* -Destination $DevDrive\Packages

# Set configuration
[Environment]::SetEnvironmentVariable("npm_config_cache", "$DevDrive\Packages\npm_cache", "User")
[Environment]::SetEnvironmentVariable("NUGET_PACKAGES", "$DevDrive\Packages\.nuget\packages", "User")
[Environment]::SetEnvironmentVariable("MAVEN_OPTS", "-Dmaven.repo.local=$DevDrive\Packages\.m2 $env:MAVEN_OPTS", "User")
[Environment]::SetEnvironmentVariable("GRADLE_USER_HOME", "$DevDrive\Packages\.gradle", "User")
Check the Dev Drive documentation on how to configure other package managers.
Dev Drive for .NET – Package restore and MSBuild
At this point, with source code and packages on a Dev Drive, you can try out a NuGet package restore for a project (or an npm install if you’d like), and see if it is faster for you. Here’s a short PowerShell script that you can run in your project directory to clear out all bin and obj folders, and run a dotnet restore:
dir .\ -include bin,obj* -recurse | foreach($_) { rd $_.fullname -Recurse -Force}
dotnet restore
The Dev Drive definitely seems faster: I consistently see faster package restores. Here are some unscientific measurements of running dotnet restore on a 4-project solution that has 41 dependencies across those projects:
| Average restore time - NTFS | Average restore time - Dev Drive | |
|---|---|---|
| Project1.csproj | 846 ms | 434 ms |
| Project2.csproj | 871 ms | 434 ms |
| Project3.csproj | 1.39 sec | 740 ms |
| Project4.csproj | 1.29 sec | 730 ms |
On another solution with 22 projects, I’ve tried several builds (clean and rebuild in Rider), and saw an average of 32.41 sec on NTFS, and 19.8 sec on the Dev Drive. Faster again!
Dev Drive and Copy-on-Write
While researching Dev Drive and ReFS, I came across the concept of Copy-on-Write (CoW). This is a Windows API that uses block cloning and avoids fully copying a file by creating a metadata reference to the original data on-disk, only copying the actual data when the new file is appended to or opened for write. This should save disk space and time, since “copying” files is nothing more than adding a pointer to the original file on-disk.
Explained in .NET terms, it means that copying a reference assembly (e.g. System.IO.dll) is nothing more than writing some metadata and should make building a project even faster.
Good news: there is a NuGet package that comes with an update for the MSBuild <Copy> task and uses CoW. If you are using NuGet Central Package Management, you can add the following to your Directory.Packages.props:
<Project>
  <ItemGroup>
    <!-- other <PackageVersion> elements here -->
  </ItemGroup>
  <ItemGroup>
    <GlobalPackageReference Include="Microsoft.Build.CopyOnWrite" Version="1.0.240" />
  </ItemGroup>
</Project>
Alternatively, you can reference it as an MSBuild SDK in your Directory.Build.targets file:
<Project>
  <Sdk Name="Microsoft.Build.CopyOnWrite" Version="1.0.240" />
  <!-- ... -->
</Project>
After trying this on a few solutions, I can’t say I’ve seen a lot of meaningful performance increase. The average time for a clean build did not go down with more than a few milliseconds. Of course, your mileage may vary!
Dev Drive for the JVM
I did want to quickly try running a clean build of a Kotlin project. With the source code, and the Maven and Gradle caches on the Dev Drive, I ran a quick .\gradlew.bat :clean :build on a relatively simple project.
The result: 13.45 sec to do a clean build on NTFS, 10.2 sec on the Dev Drive. Once more, slightly better performance!
Dev Drive for your IDE
Someone suggested moving my JetBrains IDEs and caches to the Dev Drive, which is definitely possible! You can set the Toolbox App install location to a path on your Dev Drive, or configure cache locations manually.
I wanted to give this a try without updating my existing installations, so I downloaded the latest Rider 2023.3 EAP as a ZIP file, and extracted it to an NTFS location and to a Dev Drive location. You can update the IDE paths used in the bin\idea.properties file:
idea.config.path=E:/rd/stuff/config
idea.system.path=E:/rd/stuff/system
idea.plugins.path=E:/rd/stuff/plugins
idea.log.path=E:/rd/stuff/log
To make sure both IDE copies have the exact configuration, I launched both bin\rider64.exe and imported settings and plugins from my existing IDE installation, then closed the IDE again.
Two more unscientific benchmarks originated from this: using a stopwatch to measure the time it takes to start the IDE and show the welcome screen, and using a stopwatch to open a 38-project solution and wait for Rider’s background tasks to finish. Just for fun, I added a third benchmark: all of the above, on an NTFS drive, but with Microsoft Defender real-time protection disabled.
Here are the results:
| Rider on NTFS Caches on NTFS MS Defender real-time Sources on NTFS | Rider on Dev Drive Caches on Dev Drive MS Defender performance mode Sources on Dev Drive | Rider on NTFS Caches on NTFS MS Defender disabled Sources on NTFS | |
|---|---|---|---|
| Starting Rider | ~6.5 sec | ~6.5 sec | ~6.0 sec |
| Opening solution, restoring packages, re-indexing | ~1 m 07 sec | ~58 sec | ~59 sec |
Dev Drive is definitely faster, but when compared with NTFS + no Microsoft Defender, the difference is very minimal.
Conclusion
In this post, we’ve covered Dev Drive support in Windows 11. It promises better performance for typical developer workloads, and as we went through my personal story of migrating and testing it out, it delivers on that promise. There are a few caveats to using Dev Drive (such as OneDrive not supporting it), but I’m sure those will evolve in the coming time.
We covered how to create a Dev Drive, and how to configure package managers such as NuGet, Maven, Gradle and npm to store their caches on a Dev Drive. We have also started the IDE from a Dev Drive to see if it is more performant.
In general, Dev Drive does seem faster in all cases, although I’m not entirely sure whether that’s thanks to using the ReFS file system, the Microsoft Defender Antivirus performance mode, or a combination of both. I’m curious if we’ll ever see Microsoft Defender Antivirus performance mode for NTFS.
Regardless, if you are on Windows and you’re okay with some of the limitations of Dev Drive, I’d definitely recommend giving Dev Drive a try. The performance difference for some smaller projects and builds is not earth shattering, but over the course of a day it might add up for your workflows.
Let me know in the comments if you have tried Dev Drive and what your experiences are!


7 responses